
Recommended Tools And Supplies:

- felt fabric
- toy stuffing
- doll eyes
- pipe cleaners
- needle and thread
- small scissors
Make Your Own Felt Stuffed Unicorn!
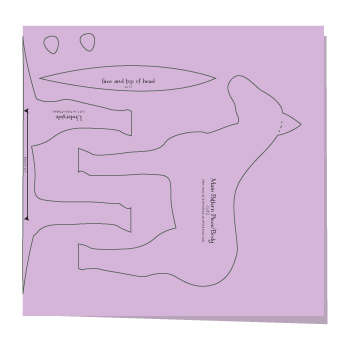
Begin by cutting all of your felt pieces as directed by the last page of the pattern. The easiest way to cut felt is with a small sharp pair of scissors. For the greatest precision you could choose to trace the pattern pieces onto the felt, iron some wax paper to the felt then trace onto that and cut, or tape the pattern pieces to the felt with some wide clear tape, cutting through both tape and felt simultaneously
Step One! Cut all of your pattern pieces from the felt. Fold the felt in half. Lay the “Middle Body” piece on the fold at the top of the felt, across the fold. Lay all other pieces arranged on the folded felt so that you are cutting two pieces at once while cutting. The only piece that does not need to be doubled up is the “Middle Face” piece.
Step Two! Install doll eyes on the horse. To do so, make a small hole where you will place the eye. Use the black embroidery thread to create eye-lashes by stitching simple short straight stitches facing away from the eye. Place the post of the plastic doll eye through the hole and then press the washers down over the back of the post with your fingers. Trim the back part of the ear using dotted line as a guide. Fold the ear forward on the inside of the horse. Place a stitch or two to hold in place.

Step Three! Place stitches along the tops of the legs on the “Under Body” piece. Simply fold each leg under and stitch along the top of each leg.

Step Four! Begin Sewing! Start by pinning the underside “Middle Body” piece to one of the “Main Body” pieces by pinning at the legs/ hooves and underside. Beginning at the bottom of one hoof, secure your thread on the inside of the felt by sewing several stitches on top of each other in one spot. Then pass the needle to the outside of the felt and begin sewing the pieces together. Sew from the back of the hoof upwards across the back of the leg and down again to the front of the back hoof. Secure your thread on the inside of the felt.


Begin Sewing again, but this time at the opposite side of the horse repeating the steps above.
Once you’ve sewn the opposite side of the “Main Body” piece to the “Middle/Underside Body” piece, secure your thread at the bottom/front of one of the back hooves. Attach and sew on one of the “Bottom Hoof” pieces to the bottom of the leg/ hoof. Sew all the way around the hoof so that the bottom is completely attached. When you reach the front of the hoof again begin sewing upward attaching the “Middle Body” piece to the back of the leg. When the end of the “Middle Body” piece is attached at the rear secure your threads and tie off. Repeat the above steps on the opposite side of the horse.


Begin sewing the front of the horse again, attaching a front hoof and moving upward toward the chest. At the end of the “Under Body” piece tie off the thread at the chest. Sew on the opposite hoof, moving upwards past the chest and attaching the “Middle Face” piece as you reach the bottom tip of the face. Continue sewing until you reach the end of the “Middle Face” piece, switching to a running stitch when you pass over the ears. Continue stitching until the bottom of the face piece is sewn on. Tie off your thread.
Return to the front of the face, this time stitching the opposite side of the face into place, ending just past the ear about 3/4 down the neck.
Step Five! Now to add some stability and pose-ability to your horse/unicorn! Take one of your pipe cleaners and fold it in at the ends by about a 1/8 – 1/4” inch. Hold the pipe cleaner up to the sewn legs of the horse and fold the ends up to size the wire to fit correctly into the legs. Shape the wire to bend down at the legs to fit inside of the horse. Repeat for the other set of legs

Stuff the hooves only on the horse. I like to use a popsicle stick or similar object to help push the filling firmly into place. Once the hooves are stuffed insert the pipe cleaner into the legs in front and back of the horse.
Stuff the rest of the legs and bottom of the horse.
Begin sewing again at the back of the horse. When you have only about 1-2 inches of an opening left stuff the horse completely and stitch the opening shut.
Step Six! Create the Unicorn horn! Cut the unicorn horn felt piece. Fold in half lengthwise and sew down the side to create a cone shape. Thread your needle with the yellow embroidery thread. Make a small knot on the end and send the needle through the wide part of the cone and out the tip, so that the knot can be pulled inside the horn and nestled into the inside tip of the horn.


Stuff the horn full of fiber fill using a toothpick to push the filling down. Wind the embroidery thread around the horn moving downwards diagonally. Secure the thread around the horn by moving the embroidery thread under some of your stitches on your way down to the bottom of the horn. At the bottom of the horn send the needle back up through the fiber fill and out the side of the horn near your stitching. Trim the end of the thread very close to the edge of the felt.

Re-thread the needle with white thread and make a few stitches on the horse’s forehead to secure your threads in place. Stitch the horn in place. The more stitches you make the more strong the horn will be. Make the last stitch by sending the needle straight down through the head and out the lower part of the head. Knot the thread and trim close to the felt.
Instructions for creating a yarn mane (discontinued kits)
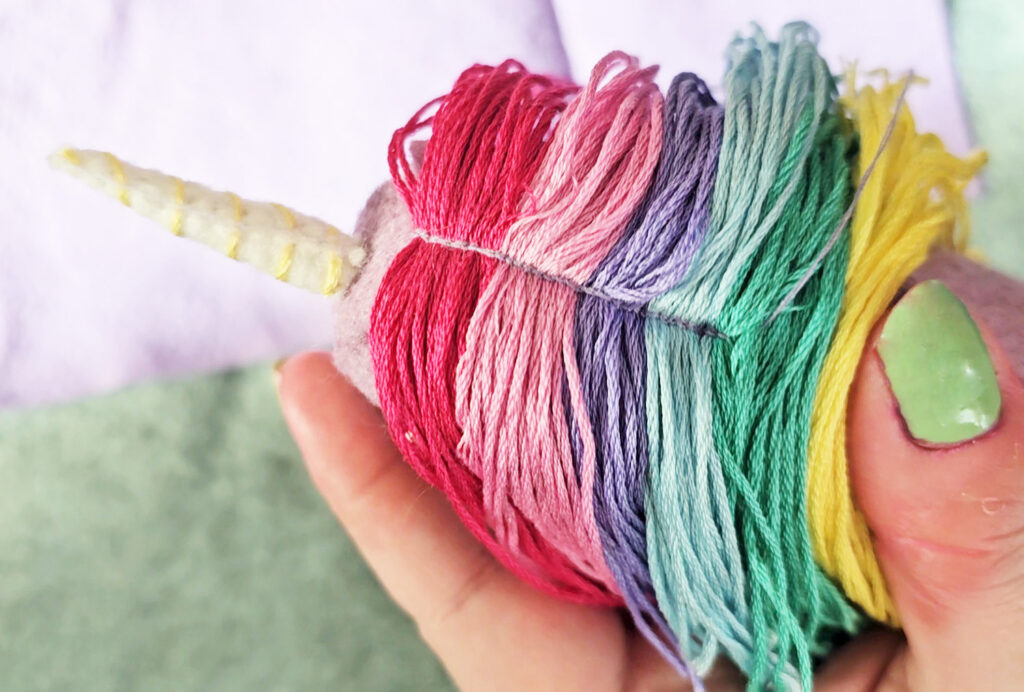
Step Seven! Attach a Mane! Lay multicolor pieces of embroidery floss over the horse’s neck from the ears to about 3/4 down the neck. Stitch a straight line from the top of the head to the end of the neck. I like to use a back stitch.
To create a tail lay a strand or two of embroidery floss flat. Lay several other pieces over the strand that is in the opposite direction across them. Tie a tight knot with the original strand or two.
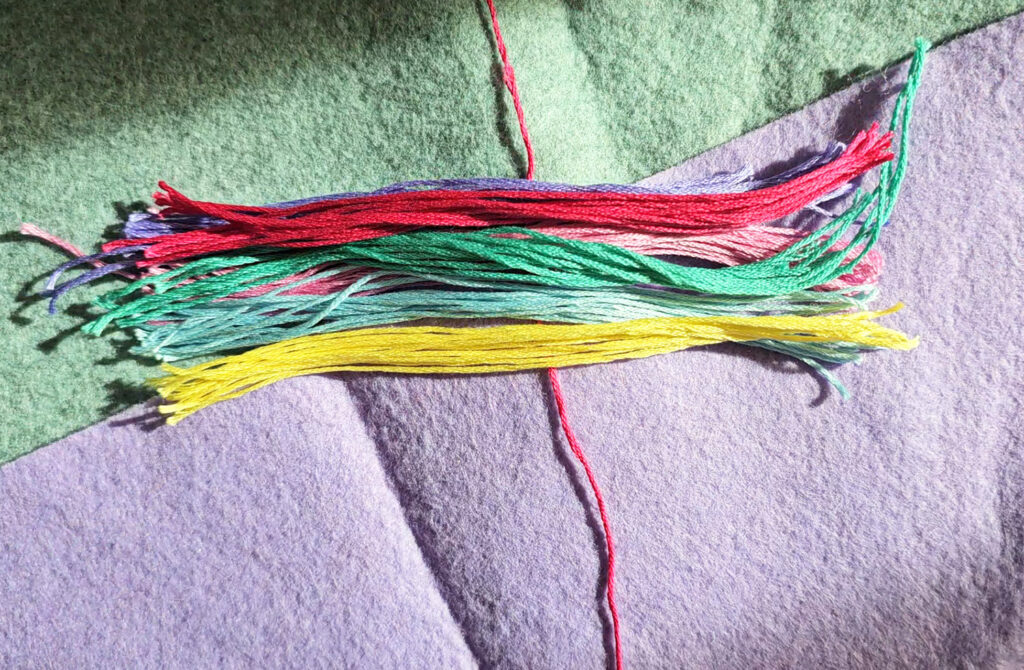
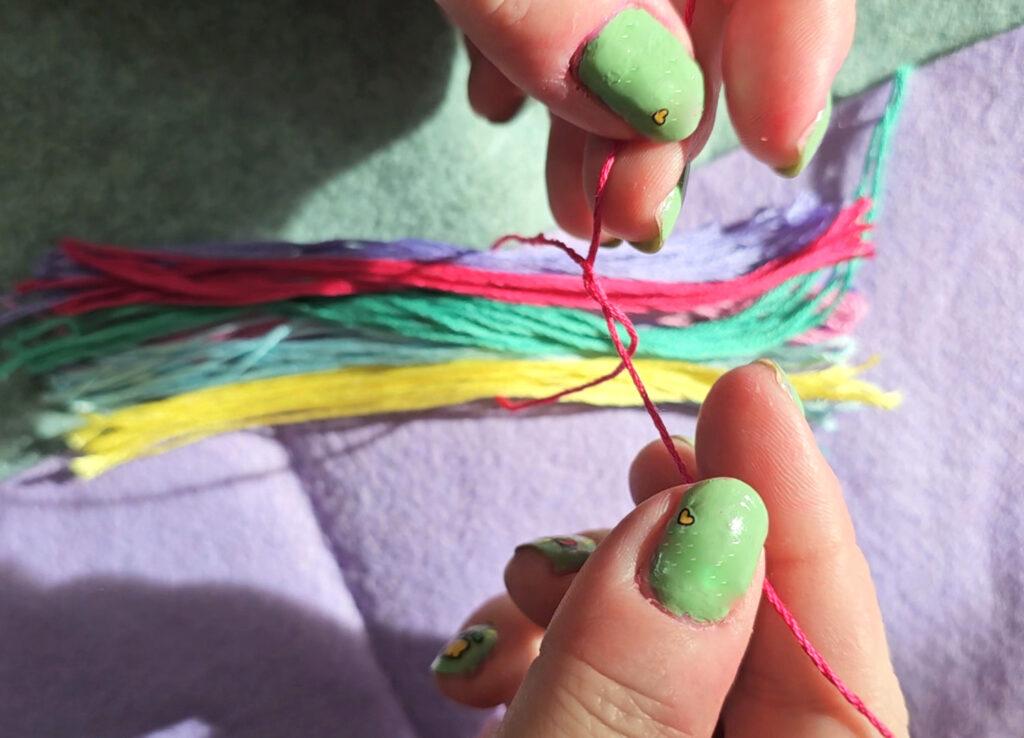
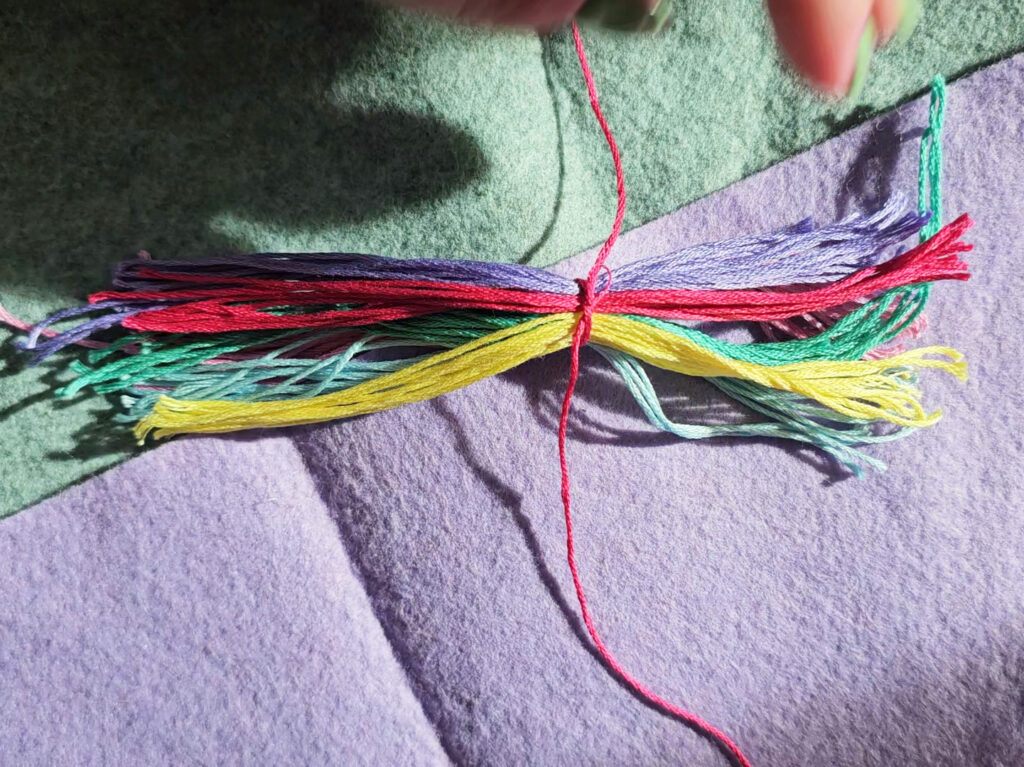
Fold the bunch of embroidery floss in half. Pin to the back of the horse and stitch into place onto the back of the horse by stitching through the knot onto the horse.
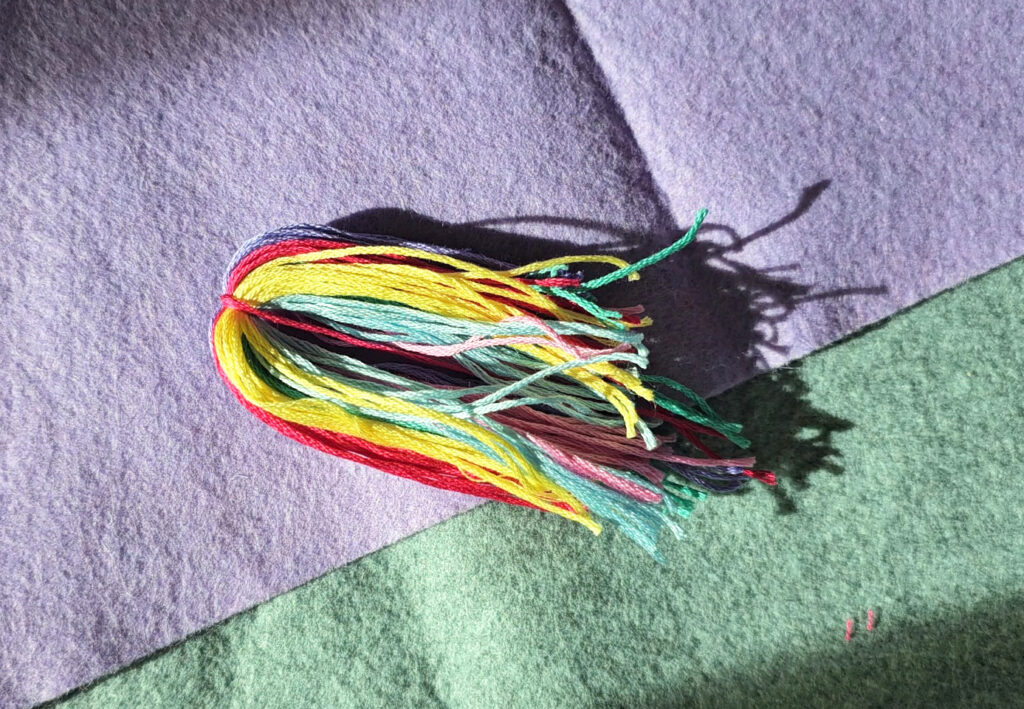
Make a few stitches to secure your thread into the back of the horse where the tail would be located. Send the needle and thread through the knot you just created holding the strands together. Sew back through the horse and over again to secure another stitch through the end of the tail. Repeat this until the tail feels secure. Tie off the stitches under the tail.
