
Recommended
Tools And Supplies:
Pre-cut felt snail pieces
4mm doll eyes
embroidery thread, thread and needle
toy filling
wire
small sharp scissors
stuffing tool (chop stick and/or tooth pick)

MAKE YOUR OWN FELT SNAILS!

There are two separate snail kits available from Delilahiris Designs. This tutorial will walk you through the instructions for both! Follow along to sew your own snail, then create the beautifully hand embroidered shells.
Let’s Get Started!
Begin by cutting each pattern piece from the felt provided with your kit. For the best results in cutting felt it is recommended to tape the pattern to the pieces of felt using wide clear tape. For more detailed instructions check out our felt cutting tutorial.
To begin sewing, start by knotting your thread at the back middle of one of the shell pieces. Overlap the edges of the spiral shape by just about 1/8″ and stitch a straight running stitch all along the spiral. Repeat for both sides of the shell, being careful to stitch together two mirroring shell sides.


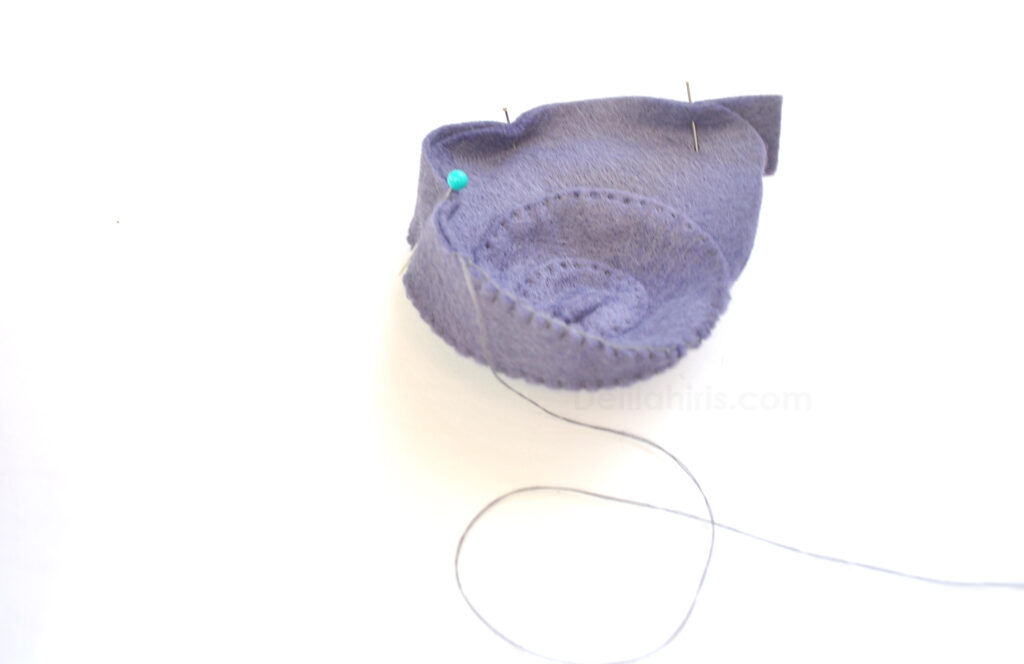
Hold both sides of the shell together with the insides facing and stitch together just at the bottom of the shell, attaching only about 3/4″.

Match the top of the shell piece, starting at the pointy end, to one edge of the snail shell and begin stitching the edges together.

Sew along the entire edge until you reach the end of the Top of the Shell piece. Return to the back of the shell to begin stitching the opposite side of the shell and top together.

You can choose to pin the edges together to make the stitching a little easier, and to assure the edges match up exactly.
Stitch along to the end of the Top of Shell piece. Stuff the inside of the shell.


Install safety eyes to the snail by matching both body pieces together and poking a small hole through both layers of felt. By matching the felt pieces first you will ensure that both eyes are placed symmetrically.
Put the post at the back of the black plastic eye through the hole, and fit the small plastic washer over the back of the post to hold the eye into place.


Pin the snail antennae together and begin stitching at the front of the snails “face”, stitching and moving back toward the antennae and up and around the anttenae.

Continue stitching past the antennae and down the back until you reach the end of the two pieces. Tie off your thread at the inside of the snail.
Match the front of body piece to the front of the snail and stitch those edges together as shown above.

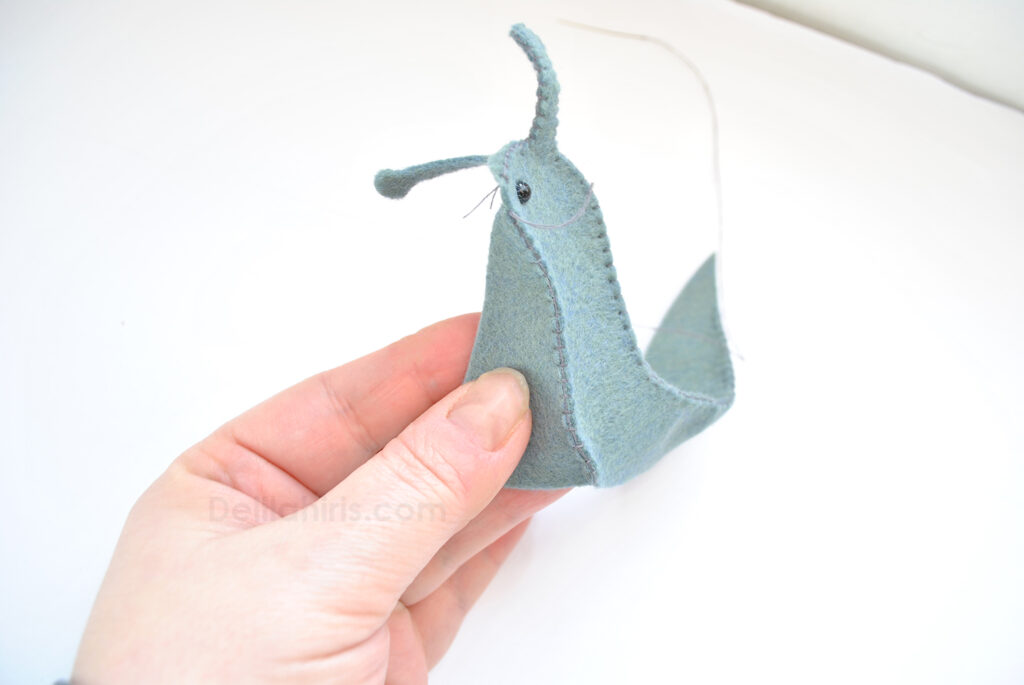
Match and pin the two sides of the snails body together. Begin stitching from the front, at the bottom of the front of the body.

Stitch the entire opposite side of the snail together the same way as the first, up over the antennae to the back.
Cut and ben some wire to the length of both antennae, using the snail as a reference to size. Bend the two ends up as in the picture below. You will insert the wire into the antennae for a poseable toy. Alternatively, you can simply stuff the antennae by pushing toy stuffing into the felt in very small pieces as a time, using a toothpick.

Pin the shell to the top of the snails body.

Begin stitching in place with a whip stitch from underneath (the inside of the snail).

Begin stuffing the snail by pushing toy stuffing into the head and front of the body. Pin the top of the snail to the bottom piece of the snail. Begin stitching at the front, taking care to line the edge of the felt of the snails body to just inside of the ruffled edge of the bottom piece.


Continue sewing all the way around the edge until you have just about an inch or two opening left. Stuff the remainder of the snail’s body. Sew the opening shut.

Adding Details and Embroidery!

Succulent Snail
Start by creating our mini felt succulent by layering these 3 pieces of felt.

Make a small knot in the top of the snail shell.


Send the thread through the 3 layers of succulent felt, then back downward into the snail shell creating a small stitch in the middle of the felt succulent.


You will train the needle out through the shell under the succulent. Going forward, use the space under the succulent to hide extra stitches and to tie off threads.
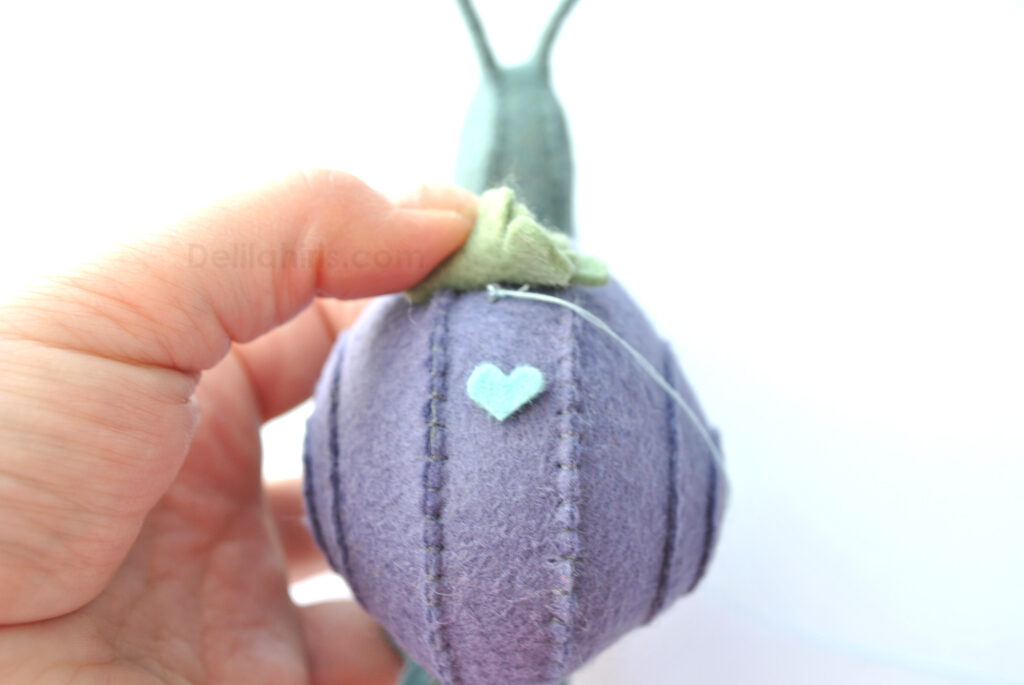
Next we will add a small heart just behind the succulent. Start by knotting some thread under the succulent, then sending the needle through the shell and out again under and through the heart. Stitch the heart into place with a very small back stitch.


Next we’ll add a flower detail just under the heart. Here you can choose to knot your thread into the shell under the flower, or under the succulent. Use a back stitch to stitch the flower in place. Add two leaves by sending a single straight stitch through each leaf at the middle.

Add a decorative detail to the flower with embroidery thread. Here I began by knotting the embroidery thread under the succulent, then sending the needle through the shell and out at the bottom of the flower.
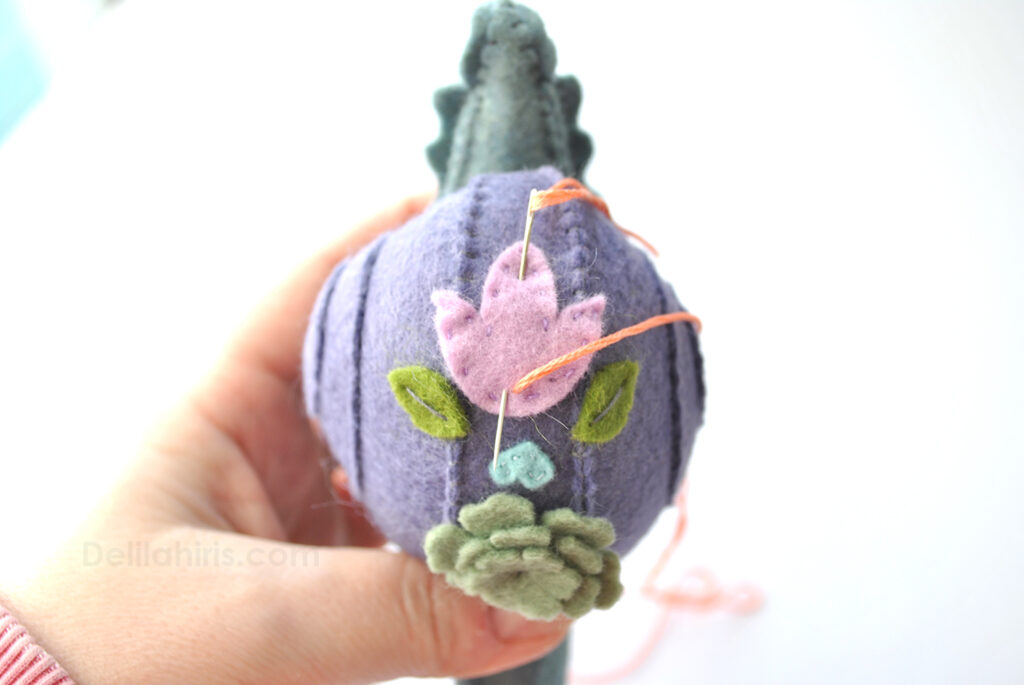


After creating three stitches on the flower as shown above, exit the thread just above one of the pointed flower tips. Make a single French knot at each point.


Next we’ll add some flowers and a heart to the front of the shell. These can be stitched in place with a tiny backstitch or a larger stitch to the center of the flower with 2 accompanying smaller stitches to either side.
Next we’ll add some simple back stitch embroidered flower stems. Send the green embroidery thread out of the shell just under the middle blue flower.


Back stitch downward to create a single stem pointing downward. Add stitches to create leaves at the bottom of the stem, then add back stitching to connect the other two flowers. Add more leaves an stems. The second set of stems will be placed about halfway between each flower.

Add two stems (single straight stitch) further up by either side of the succulent (see below).

Switch to white thread to create a series of 3 lazy daisy stitches at the top of these stems.


Using the same white embroidery thread, make 3 french knots just above the extra stems between the three blue flowers at the front of the shell. Then switch to the coral thread and make 3 spaced apart french knots on the sides between the leaves and white flowers. (see below)

Snail #2 – Daisy Snail Embroidery and Details
Begin by creating the daisy by layering the white flower petals.

Knot your thread at the top of the shell, then send the needle through the bottom of the flower and out through the middle top of the flower.


Send the needle back through the shell and out of the top of the flower again to create 2 stitches at the top.

Tie off your threads under the flower to hide them. Knot some green thread under the flower, then send the needle through the shell and out through a small leaf. Stitch the leaf into place with a single straight stitch. Add a leaf to both sides of the flower.


Next we will add some blue flowers to the front of the shell! Knot a new thread color under the white flower petals then send the needle through the shell and out of one of the flowers.

Stitch the flowers in place with three straight stitches each flower.


Next we’ll add a peach colored flower to the other side of the white daisy, back of shell. back stitch this flower in place, once again knotting and tying off threads under the white daisy.

Add pink flowers to the sides of the peach flower. Next add a decorative embroidery thread detail to the large peach flower.


Create a flower stem running from just under the pink flower to just under the peach flower. Use a larger laisy daisy stitch to create a leaf shape at the end of the green stems.

Add three french knots in a small cluster just by the sides of the white daisy at the top of the shell.


Add a small pink heart to the front of the snail shell. Then begin creating flower stems and leaves to the three blue flowers at the front. Begin with a single straight stitch from just under the flower, repeating for each flower.

Create leaves at each flower stem using a single lazy daisy stitch at each side.


Done! Admire your work and on to the next project! Head over to Delilahiris.com to checkout some more craft kits!