
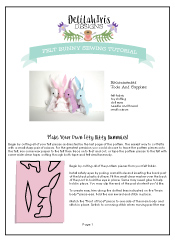
Recommended
Tools And Supplies:
- felt fabric
- toy stuffing
- doll eyes
- needle and thread
- small scissors
Begin by cutting all of your felt pieces as directed by the bunny sewing pattern. The easiest way to cut felt is with a small sharp pair of scissors. For the greatest precision you could choose to trace the pattern pieces onto the felt, iron some wax paper to the felt then trace onto that and cut, or tape the pattern pieces to the felt with some wide clear tape, cutting through both tape and felt simultaneously
Begin by cutting all of the pattern pieces from your felt fabric.
Install safety eyes by poking a small hole and inserting the back post of the black plastic doll eye. Fit the small clear washer over the back of the post to hold the eye in place. Some may need glue to help hold in place. You may clip the end of the post shorter if you’d like.


To create ears, trim along the dotted lines indicated on the “main body” piece ears. Fold the ear inward and stitch in place. Match the “front of face” piece to one side of the main body and stitch in place. Switch to a running stitch when moving past the ear.
Sew the front of face piece into place and tie of your stitches. Create a tail by sewing the two tail pieces together along the top curve. Fold the tail inside out so the stitching sits on the inside.
Match the two “main body” pieces together and pin in place, sandwiching the tail between the two layers and pinned into place at the base of the body. Begin sewing the layers together starting at the front of the neck and ending at the base of the tail.


Pin the front of body piece into place and begin stitching from the tip of the toe along the entire front until you
meet the opposite toe.


Stuff the head and front limbs first. You will want to use a dowel or chop stick to push the stuffing into the head. I like to use a tooth pick to push small amounts of stuffing into the arms. Fill the rest of the body up to the top.
Match the “Bottom of Bunny” piece into place and pin. Stitch along the entire outer edges until you have only a small opening left. Use the small opening to push in any more stuffing needed into the tips of the toes and bottom. Sew the opening shut. Viola! Start on your next bunny!